Due to the amount of bad weather we have been experiencing over the last few months, I decided to use my spare time doing some maintenance on my Stessl Truck 4.65m centre console.
Some of you may remember me building up this boat as a project boat in QFM way back in 2003. When I was initially fitting out this hull, the last few tasks had to be rushed. This was mainly because I needed to get my new boat onto the water in time for a fly fishing tournament. One task I never got around to was to put nylon plates under my rod holders to stop the paint bubbling. Well after several years of use, the inevitable has happened, and now I need to rectify the problem as best I can.
Paint generally blisters and bubbles due to electrolysis caused by the meeting of two different metals. Add salt water to this equation and it accentuates and accelerates the problem. At times, saltwater can also get under the paint and swell, resulting in a blistered look.
My repair job was well overdue, as the bubbling had started several years ago and was now gradually spreading outwards from each rod holder. As such, I needed to cover a reasonable area around each rod holder to hide the blistered areas.
Covering the area is much easier than respraying, which would require acquisition of the correct metallic paint, clear coat finish, spray gun and other materials to complete the job. Even then, the finish would not be close enough to the original to avoid detection without sanding, painting and finishing the entire gunwale, not just the section around each rod holder. As this was not an option for me, especially when I live in a townhouse with minimal work area, I decided that placing polythene plates between the rod holders and the gunwales was the best solution.
After some discussion and research, the material I chose was CPG Seaboard, which is available in many differing thicknesses. The sizes most suitable for my application would be the 6mm or 9mm. I chose the 9mm because I wanted to raise my rod holders slightly and desired the water to run around the plates instead of over it.
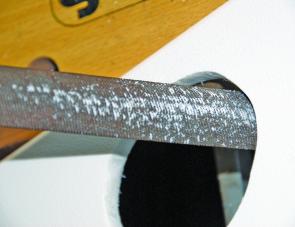
CPG Seaboard is high-density polythene that is white in colour and has a textured finish. It is sandable, knife friendly and nothing will stick due to the anti-bacterial properties. CPG Seaboard is 100% UV stable and distributed by Sharp Plywood. A 1350mm x 2400mm sheet of 9mm costs around $200; prices vary a little for other sizes. There are a few places where you can buy smaller quantities cut to size and shape. This material is suitable for a broad array of applications including cutting boards, live-well lids, small hatch lids and console tops.
Every repair job will require slightly different tools but for my job I used the following.
I had obtained my CPG Seaboard already cut to shape and with bevelled edges, however, if you purchase an entire sheet then you will require a hacksaw, electric cut off saw or a jigsaw to cut it to size, plus a plane or file to bevel the edges.
For cutting and shaping the cut-outs in the CPG for the holders to pass through, I required a drill (electric or battery powered) and drill bit, bastard file (or curved rasp) and a coping saw (or jigsaw). A coping saw is easy to use and you can get one for as little as $10 at a hardware shop.
Other items required included a paint scraper (or large flat bladed screwdriver), sandpaper, Silastic, mineral turpentine, disposable rags and a permanent marker pen. Appropriately sized spanners, sockets and screwdrivers will be needed to remove your old rod holders and also to re-secure them. I had to purchase some nylon washers and longer Phillips flat-head stainless steel bolts with nylock nuts, as the old ones were now too short.
With all this at your disposal, you can now get started. I have eight rod holders in my boat and they are all on slightly different angles. For this reason and also because I was doing this task during limited periods of spare time over a few weeks, I decided to complete each one individually before going on to the next, in case I needed to use the boat in the meantime.
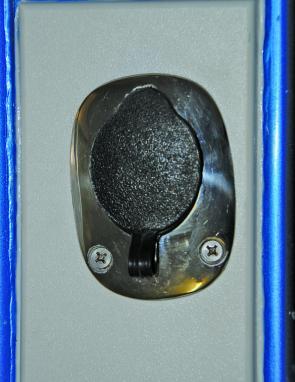
(1) This is how most of my rod holders looked before I started. The paint has swelled and bubbled around the edges.
(2) Remove the rod holder and use a paint scraper or wide, flat-bladed screwdriver to remove the bubbled paint from the effected area.
(3) Sandpaper the entire area back to bare metal around the affected area. Also lightly sand the rest of the painted area that will be under your plate to help the Silastic adhere.
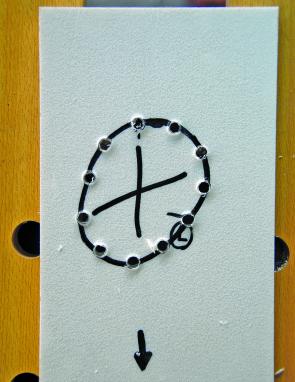
(4) Place the CPG Seaboard plate over the area and work out its best position, taking into account that you want to cover the entire scraped area and have roughly the same amount of plate on each end of the hole. While holding the plate in position, use a waterproof marker to trace around the rod holder hole from under the gunwale to give the exact position of your cut-out.
(5) Turn your plate over and drill a series of holes around the perimeter of the hole you have marked. The final cut-out will have to be slightly larger than that marked and you will have to cut on the outside of the line, at a minimum, to avoid heaps of rasping later.
(6) Remove the blade from your coping saw, pass it through one of the holes in the CPG and then secure it back in the coping saw and tighten. Cut around the perimeter of the cut-out mark from hole to hole until the piece falls out. You can also use a jigsaw for this task if you have a fine blade.
(7) Position the plate back on the gunwale to check the position of the hole. Put the rod holder through the plate and gunwale and position it to your desired angle to determine where you need extra filing to make it fit correctly. Mark these areas with your marker pen.
(8) Use your rasp to enlarge and shape the hole until all fits correctly. You may need to repeat these last steps a few times to get it correct.
(9) When you are happy that it is all going to fit correctly, turn your plate over, peel off the thin plastic layer (if applicable) and then apply some Silastic to the base.
(10) Use your finger to smooth the Silastic evenly over the entire base of the plate. This will create a permanent barrier for any water when adhered to the gunwale.
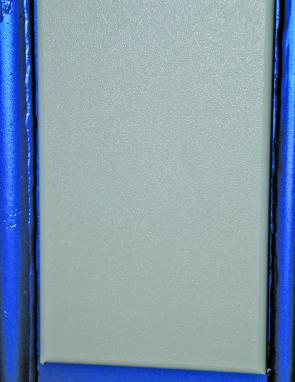
(11) Position the plate in place on the gunwale and apply some firm downward pressure until small traces of Silastic just start to protrude out from the edge. Put the rod holder back in to make sure all is now positioned correctly and the holder is at the desired angle. Leave the holder in while the Silastic dries. It is best to wait 24 hours for the Silastic to cure.
(12) When the base plate is firmed adhered to the gunwale, drill one of the holes. Put the bolt through, place on the nylon washer and then the nylock nut. Tighten lightly. Repeat for the next bolt and then the last one.
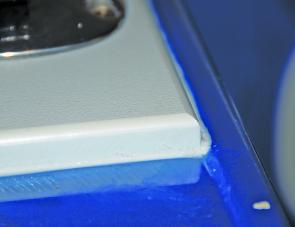
(13) With the nozzle of your Silastic tube cut on an angle, apply a thin bead all the way around the plate where it meets the aluminium. Smooth this out with the tip of your finger, wiping away any excess with a cloth soaked with a little mineral turpentine. This will totally seal the junction of these two materials, eliminating the possibility of any salt water getting under it.
(14) With the job now completed, there should be no more issues with bubbling paint around my rod holders. I should have done this job years ago however now is better than never. If you have a similar problem around rod holders, light fittings, bollards or other areas where different metals meet, then this is any easy way to fix it.
Contacts
| Sharp Plywood | (07) 3271 4511 |
|---|---|
| Alltype Plastic Fabrication | (07) 3711 7688 |
| Miles Plastics | (07) 5491 7741 |