After a long winter of casting vibes, it’s a great time when the waters begin to warm and targeting bream in the shallower margins becomes all the rage again.
The visual aspect of spotting fish, the need once again for some accurate casting and finally the savage, often visual strike, make for some exciting sports fishing. Targeting bream and estuary perch in these shallower waters brings a wide variety of techniques into play, like shallow crank baiting, pink grubbing and topwater lures that are usually not as effective in the cooler months.
Fishing soft plastics on light resin heads is also a technique well suited to fishing this popular edge bite.
I was first introduced to this technique on a trip to Gippsland way back in 2005. The flighty snag-dwelling Gippsland bream would spook instantly should even the lightest lead weight jig head was tossed into their midst.
Yet the same plastic impaled on a resin head would not. There was a slight problem though, as at this stage, these resin heads were only in the ‘prototype stage’ and weren’t available to the general public.
Undeterred I returned to my shed and tried to make something that would work like these. Even once the resin head jig head become available in shops I still liked to make my own.
That way I can use a variety of hook sizes some of which are more suited to a variety of different plastic shapes. These heads also can be made to make a smooth alignment between resin head and plastic which helps them look and swim in a more natural matter.
Cut some Blutac strips to the length required, based on the number of jig heads you wish to make.
Layer the strips of Blutac to a height approximately the length of the size of the jig head you require. Use an implement to make an indentation in the Blutac that becomes your mould.
Don’t go right to the bottom, but leave about one layer of blue tack that is about the length of the eye of the hook you place in the mould. The picture shows using round nosed pliers but any solid conical shape will do.
Lightly coat the mould with an oil based scent. Don’t put too much in that it begins to pool up in the bottom of the mould or the head won’t form correctly. I use aniseed oil, as it is a proven fish attracting smell. Not only does this give the heads a nice attractive smell for the fish but helps with the removal of the blue tack from the dried head once ready.
A slight hint of food colouring is an optional extra if you want to try match the colour of the resin head to the plastic. Once again don’t let the dye pool up too much (as you can see it has in the far left hole.) or the head won’t form properly. A syringe is a good way to control this delivery.
Carefully place the hooks into the mould making sure they are as straight as possible. The eye of the hook is in the base of the mould (that last layer of blue tack as described in step 2). This is what will hold the hook in place and upright till the head has set. The Mustad Aberdeen with their long straight shank are perfect for the job and come in a variety of sizes to match a variety of plastic sizes.
Fill the moulds with super glue. I’m sure there would be other alternatives that would also work effectively but this one is cheap, requires no mixing and there is always usually at tube or two lying around my tackle bench. Two pack epoxy glues like Araldite would be good too.
Allow the super glue time to dry for at least an hour (much longer than if you were using it to stick two thing together). Carefully remove the heads and scrape off any residue Blutac from them.
Any time you are needing to fish a plastic with a slow sink rate and do not need it to get down too deep in a hurry, then it’s time to bring out the resin head. The most obvious scenario is as described earlier, snag dwelling fish that you can see holding up high in the snag, or around the top of pylons and poles.
The resin head is also great for sight casting to fish holding in shallow flats. These are fish that may be spooked by the heavy landing of a jig head. Also shallow, heavily snagged or rocky areas, that are well known jig head devourers, can be fished more successfully with a light resin head.
Even though the resin head gives a slight element of weight to assist with casting, you need to have quality specialised light tackle to be able cast these efficiently. These days though most anglers have a suitable outfit which would consist of a lightweight graphite spinning outfit in 6’6” to 7’6” range to handle the job effectively. I have been using a Daiwa Interline TMZ-762LFS recently and it is fantastic at punching the resin headed plastics a good distance away from the boat, a crucial element in fishing for fish in shallow water.
If you are casting into the snags a shorter rod is more beneficial for flicking lightly weighted plastics into tight areas. Choose a rod that has enough lower-end fortitude to extract a good fish from a snag.
Using fused or braided line is another necessity in the resin head system for a number of reasons. The properties of these lines that allow them to float which keeps your line out of the same snags you’re trying to avoid by using the resin head. The slightest touch from an inquisitive fish is also relayed to you instantly.
The leader you attach is going to be greatly determined by where you’re fishing. Dragging a big blue nose out of tight snag country may require leaders up to 6kg, shallow water flats resin heading may require a fine leader in the 2kg range.
So if you’re looking for another way of presenting light-weight plastics to fussy bream why not do some experimenting and make your own resin head style jig heads.
Reads: 5451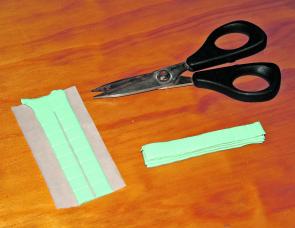
The basic materials – add some super glue or two part epoxy for the resin.
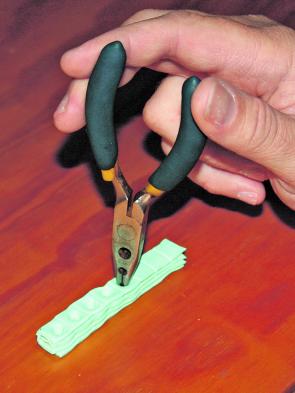
Stack the Blutac deep enough to match the length of the jig head you wish to make.
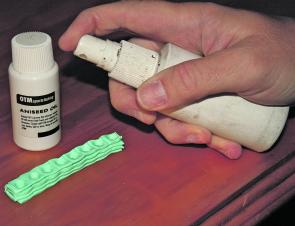
Put a fine mist of oil to release the resin from the mould – the author uses aniseed oil for the extra scent.
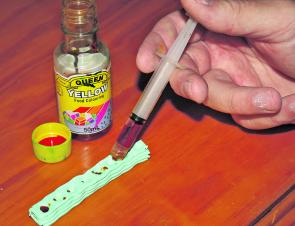
Squirt a little food colouring into the mould to match your plastic colour.
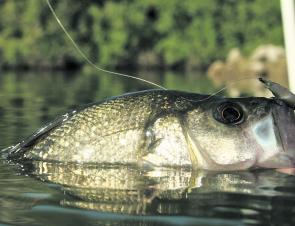
Estuary perch love the light and subtle approach.

This is the sort of snaggy country that perch and bream love to hang out in once the water starts to warm.
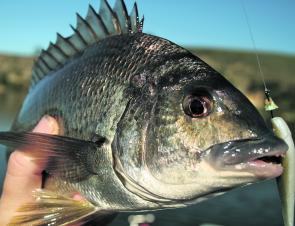
Bream appreciate the subtle approach, and the custom made resin head makes a light presentation so much easier.
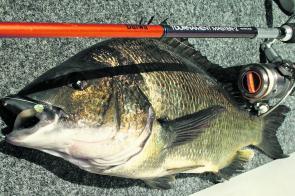
Light lures need good and well-balanced tackle to get the best from them.


