Late winter and spring can be boon times for the dedicated lake angler, rising water levels and schools of smelt that congregate along the shallow flooded margins encourage some of the large hungry post spawn trout to come looking for a high protein meal.
These bruisers cruise along the shoreline until they encounter a school then turn on the after burners and charge them with malicious intent, stunning and confusing the hapless smelt, They then turn and saunter back through the carnage to pick off the damaged smelt.
Flooded shorelines can be littered with bust-ups as these trout do their work. Often due to the nasty weather and or rapid rise of the water level the lake edges can be muddied often with a distinctive line between the dirty edge water and the drop off into deeper water.
Schools of smelt use the muddy edges for protection, but if they venture too far into the clearer water they often become victims.
This pattern is ideal for fishing the colour change, fished in short erratic strips along the edge of the dirty water is a deadly method, the flashy dubbing and glitter provide the little flashes that imitate the smelt flitting and darting in and out of cover.
This pattern is pretty adaptable in that you can change the colour of the material to suit baitfish patterns in your local area, aside from that tied in much smaller sizes it can also double as a tadpole pattern: a black version would be deadly in Tasmania’s Great Lake.
I have used this fly as a tadpole pattern to great effect on some of the lakes in the central highlands of Tasmania, particularly Bronte and some of the lakes in the 19 Lagoons area.
To prepare the fingernail fold it in half length-wise. Once that has been done colour the fingernail with whatever colour you choose. I user a Copic airbrush that uses specialised pens that comes in a huge range of colours. Once the false nail has dried, use a can of estapol clear varnish and spray the nails.
When it has dried then attach it to the fly and coat with clear nail varnish as previously described.
TYING INSTRUCTIONS and MATERIALS
HOOK:Daiichi streamer #4
THREAD:UTC black 210 denier
BODY: Lead wire and SLF prism dubbing in olive brown
WING:Enrico Puglisi Sparkle fibres and polar fibres in Chartreuse, and black
HEAD:False fingernail with stick on eyes
Reads: 2238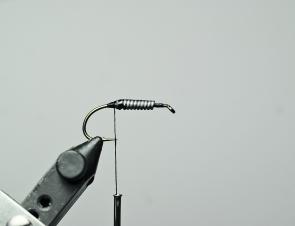
Place the hook in the vice and lay down a bed of thread. Then take 6-8 turns of heavy lead wire around the hook, the coat with superglue to help lock it into place.
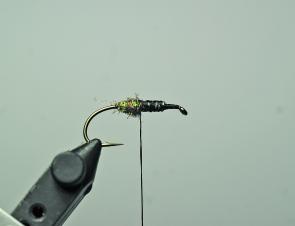
Apply dubbing to the thread then form the first part of the body.
Take the EP sparkle fibres and tie in first, followed by a small bunch of chartreuse polar fibre. Apply some more dubbing to the thread and wind over the top of the polar fibre butts.
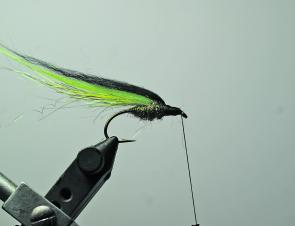
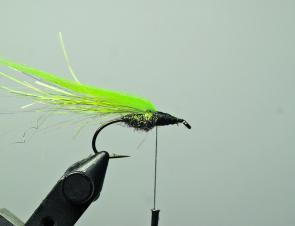
Now tie in a bunch of black polar fibre, trim the excess, then apply a little more dubbing to the thread, and again take a couple of turns over the black polar fibre butts. Create an enlarged head area with the thread as shown.
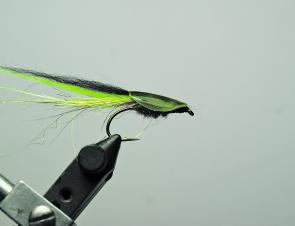
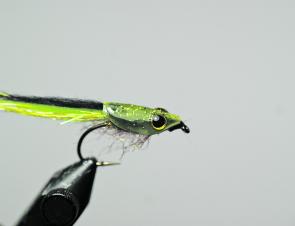
Place a little superglue gel on top of the enlarged head area and then take your pre prepared false fingernail and position it as shown, allow the glue to set.

Take your stick on eyes and attach to either side of the head as shown. Then coat the entire fingernail with a good coat of Sally Hansen’s Hard as Nails, including the eyes.

While the nail varnish is still tacky, sprinkle a little chartreuse glitter to give some added effect.